
Before you think about tossing that gorgeous glass candle jar, hang on a second. With just a few minutes of effort, you can give it a whole new purpose. Figuring out how to get that last bit of candle wax out of the glass is a surprisingly satisfying little project that cuts down on waste and even saves you a bit of money. It’s a simple skill that opens up a ton of creative possibilities around your home.
Why Bother Cleaning Out Old Candle Jars?
That empty jar is more than just a memory of a lovely scent; it’s a high-quality, reusable container just waiting for a new job. Upcycling is one of the easiest, most eco-friendly ways to add a personal, practical touch to your space. Instead of adding to the landfill, you can transform these jars into something both useful and beautiful.
This isn't an uncommon task, either. Candles are a staple in so many homes for creating a cozy, relaxing vibe. A study on consumer behaviour actually found that around 60% of households light a candle at least once a week. That’s a lot of leftover wax to deal with! You can dig into the details of these habits in the full study on consumer behaviour in CA.
Get Creative with Sustainable Upcycling
Think of that clean, empty jar as a blank canvas. Once the wax is gone, it’s ready for a new life. Here are just a few ideas:
- Stylish Storage: They're perfect for holding cotton swabs, makeup brushes, or bath salts in the bathroom.
- A Chic Planter: Small succulents, cacti, or kitchen herbs that don't need much drainage will feel right at home.
- Desk Organization: Finally, a chic way to wrangle all those pens, paper clips, and other stray office supplies.
Giving these jars a second chance is a simple act of sustainability that also lets you customize your home decor. It's a true win-win: you save money, reduce waste, and get a new, functional piece to enjoy.
When you take the time to clean out your candle jars, you’re doing more than just tidying up—you’re actively choosing sustainability over disposability. Each jar you save is a small victory for your wallet and the planet.
Before you get started, remember that the cleaning process is always easier if the candle has burned properly from the very beginning. Good candle care, especially wick maintenance, helps prevent that annoying wax ring (tunnelling) and leaves less residue behind. For some great tips on getting a clean, even burn, check out our guide on using a candle wick trimmer. A little care along the way makes this final step a breeze.
Using Heat to Melt Away Stubborn Wax
Applying a bit of gentle, consistent warmth is one of the best ways to convince stubborn wax to let go of the glass. Heat softens the wax back into a liquid, making it simple to wipe away without any aggressive scraping. It’s the perfect way to tackle that last bit of residue and get your jar ready for its next life.
I'll walk you through three of my go-to heat-based techniques. Each one works best for different types of jars and situations, whether you're cleaning a single delicate container or a whole batch at once. The real trick is just choosing the right tool for the job.
The Hot Water Method
This one’s a classic for a reason. Using hot water is a gentle and controlled way to melt leftover wax, which makes it perfect for most standard candle jars. Start by placing your jar on a heat-safe surface—a folded tea towel in the bottom of your sink works great.
Pour hot water (not boiling!) into the jar, leaving a little space at the top. The heat will transfer through the glass and melt the wax, which then conveniently floats to the surface. Let the water cool completely, and the wax will solidify into a neat little disc that you can easily pop out and toss in the bin.
Just one important note: never pour the waxy water down the drain! It can solidify in your pipes and cause a real headache.
The Oven Method for Batch Cleaning
Got several sturdy, thick-walled jars to clean all at once? The oven method is a fantastic time-saver. It provides even, consistent heat that melts the wax in multiple jars simultaneously. This technique is especially handy for soy wax, which has a nice low melting point.
Here’s what you’ll need to get started:
- A baking tray
- Parchment paper or aluminum foil
- Oven mitts
- Paper towels
First, line a baking tray with parchment paper and place your empty jars upside down on it. Set your oven to its lowest temperature, usually around 80–90°C (180–200°F), and pop the tray in for about 15 minutes.
The wax will melt and drip right onto the parchment paper. When the time’s up, carefully remove the tray, set it on a heat-resistant surface, and wipe the inside of the warm jars clean with a paper towel.
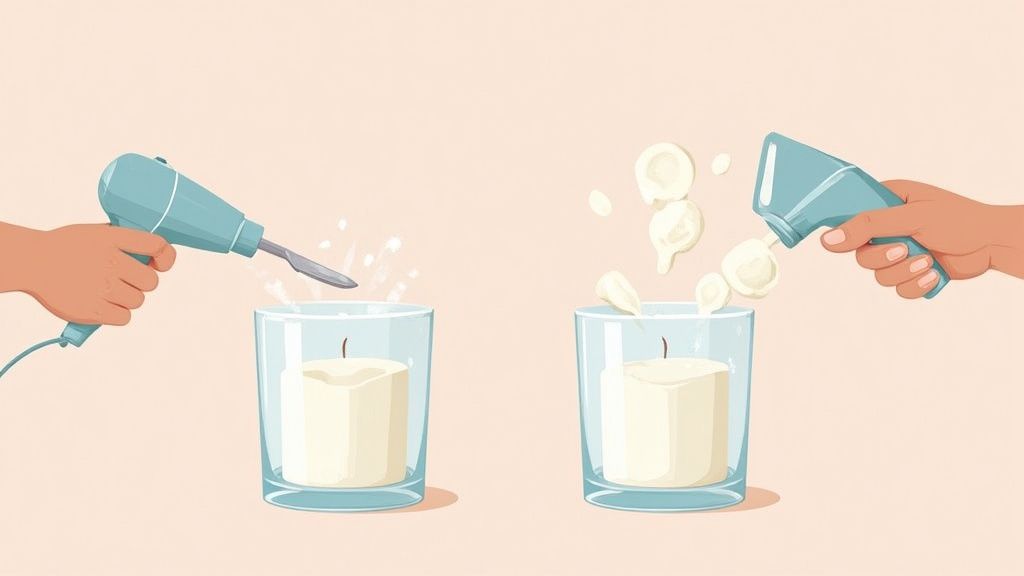
The Hair Dryer for Pinpoint Precision
For more delicate or unusually shaped glass, a hair dryer gives you unmatched control. This method is a personal favourite because it's so direct and effective. It’s a go-to trick in many households for a reason—in fact, some household cleaning findings on eScholarship show that using a hair dryer is a top technique for this exact task, with a success rate of over 90%.
Just aim the warm air from the dryer at the outside of the jar, moving it around to heat the glass evenly. You’ll quickly see the wax begin to soften and liquefy. Once it's melted, simply wipe it out with a paper towel or a soft cloth.
No matter which heat method you pick, safety always comes first. Sudden temperature changes can cause thermal shock, which leads to cracked glass. This is why you should never pour boiling water into a cold jar or plunge a hot jar into cold water. For a deeper dive into safe handling, check out our complete guide on top candle safety tips.
Pro Tip: Whatever you do, never use a microwave to melt candle wax. The small metal wick tab at the bottom of the jar is a serious fire hazard and can completely ruin your appliance. It's much better to stick to these safer, more controlled heating methods.
To help you decide which approach is right for you, here’s a quick comparison of the three heat-based methods.
Comparing Heat-Based Wax Removal Methods
| Method | Best For | Pros | Cons / Safety Cautions |
|---|---|---|---|
| Hot Water | Most standard, single candle jars | Gentle, controlled, and low-effort. | Don't pour waxy water down the drain. Avoid boiling water to prevent thermal shock. |
| Oven | Batch-cleaning multiple sturdy jars | Efficient and hands-off. Great for soy wax. | Requires thick-walled glass; not for delicate jars. Risk of burns—use oven mitts. |
| Hair Dryer | Delicate, odd-shaped, or heat-sensitive glass | Precise control and fast for small amounts of wax. | Can be time-consuming for multiple jars. Requires holding the dryer for several minutes. |
Each of these heat methods will get the job done—it really just comes down to what kind of jar you have and how many you need to clean.
Once you have a sparkling clean jar, you have a choice to make: upcycle it into something new or send it off to be recycled. This simple visual guide can help.
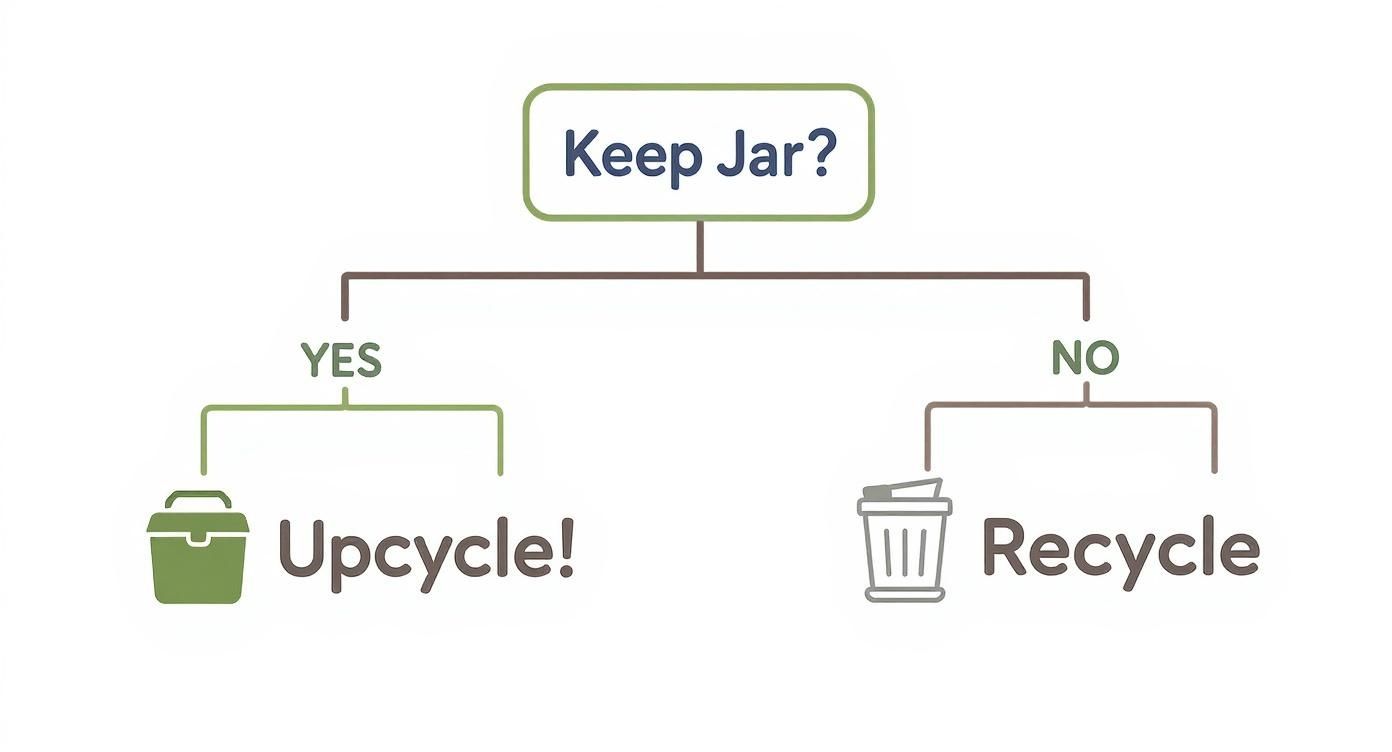
Ultimately, the infographic shows that a clean jar’s journey doesn’t have to end. It can either be repurposed creatively around your home or recycled responsibly to start a new life elsewhere.
The Freezer Method for a Clean and Easy Break
If you'd rather not deal with hot water or melted wax, the freezer method might just be your new best friend. It’s an incredibly simple and satisfying technique that lets the cold do all the heavy lifting for you. This is my go-to for a clean, mess-free solution that feels almost like magic.
The science here is pretty cool (pun intended). When you freeze the jar, both the glass and the wax inside it contract. The key is that wax shrinks more dramatically than glass. This difference in shrinkage forces the wax to pull away from the sides of the jar, breaking its bond and making removal a breeze.
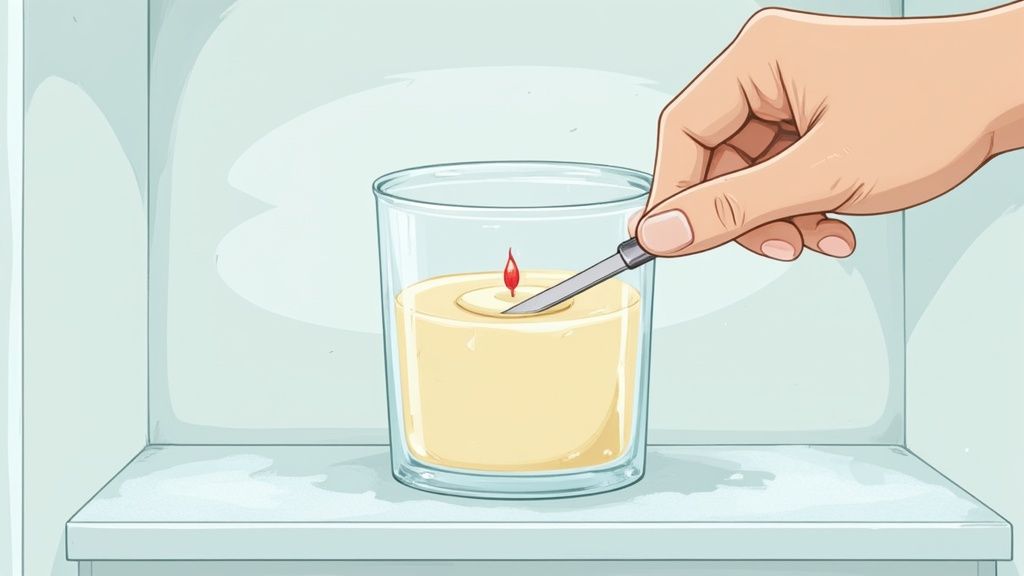
Preparing and Chilling Your Jar
First things first, grab a butter knife or a spoon and scrape out any big, loose chunks of wax still lingering in the jar. You don't need to get every last bit—the goal is just to clear out the bulk of it so the freezer can do its job more effectively.
Next, pop the jar upright in your freezer, making sure it’s on a stable surface where it won't get knocked over. How long you leave it in there really depends on how much wax you're dealing with.
- A thin layer of wax? A couple of hours should be more than enough.
- A thick, solid disc? I’d recommend leaving it in overnight to make sure it’s completely frozen through.
This hands-off approach is perfect if you want to set it and forget it.
Popping Out the Frozen Wax
Once the jar is thoroughly chilled, take it out of the freezer. You might notice the wax has already shrunk away from the glass. Often, all it takes is flipping the jar upside down and giving it a solid tap on a towel-lined counter. The whole wax disc can slide right out in one satisfying piece.
If it's putting up a bit of a fight, just gently slide the tip of a butter knife between the wax and the glass. A little bit of leverage is usually all you need to pop the frozen puck right out. You’re left with a nearly clean jar and a solid piece of wax to toss.
This method works exceptionally well with harder waxes like soy or paraffin. They become brittle when frozen, which helps them break away cleanly from the glass. It's a real game-changer for anyone who prefers to avoid heat and mess.
While the freezer trick is fantastic for jars, wax spills can happen in other, less convenient places. We've all been there. If you're dealing with a fabric mishap, don't panic! You can learn how to get candle wax out of clothes with our other handy guide.
Achieving a Sparkling, Residue-Free Finish

So, you’ve used heat or cold to get the big chunks of wax out. Great! Your jar is almost ready for its second act, but we're not quite there yet.
You'll probably still see a faint, greasy film, maybe some soot around the rim, or the stubborn glue patch where the wick was stuck. This final cleaning phase is what really takes your jar from just being empty to being truly pristine and ready for anything you can dream up.
Start with a Hot, Soapy Water Wash
Your first and best line of defence is a good old-fashioned scrub. Fill your sink with hot water and a healthy squeeze of dish soap. Let the jar soak for a few minutes; this really helps loosen that oily film left behind by the soy wax.
Grab a sponge or a bottle brush and get to work scrubbing the inside. Don't forget to focus on the bottom and around the rim where soot likes to gather. This simple wash cuts through most of the grease and grime, leaving the glass looking noticeably clearer. Give it a final, thorough rinse under hot running water to get rid of all the suds.
Tackling Stubborn Residue and Adhesive
Even after a solid wash, some stubborn spots can cling on for dear life. That metal wick tab, in particular, is often held down with a surprisingly strong adhesive that doesn't budge with the wax. This is where a little extra elbow grease comes in.
Here are a couple of tried-and-true tricks using stuff you likely have at home:
- Isopropyl Alcohol (Rubbing Alcohol): This is my go-to for dissolving that sticky wick glue. Just dab a cotton ball or paper towel with alcohol and rub the spot in circles. You'll feel the adhesive start to break down and wipe away cleanly.
- Oil-Based Solvents: It sounds a bit odd, but oil dissolves oil. A little coconut or olive oil on a cloth works wonders on that last waxy film and can help soften tough glue. Just remember to give the jar another quick wash with soap and water afterward to remove the oil itself.
Key Takeaway: The whole point of this final clean is to get the jar completely clear of any chemical or oily residue. This is crucial if you're thinking of reusing it for food, storing cotton swabs, or even as a little planter.
Ensuring a Safe and Non-Toxic Finish
Once your jar is looking good, you want to be sure it's actually safe for whatever you use it for next. To get that ultimate sparkle and prepare your jars for their new life, you might want to explore the best non-toxic cleaning products to ensure no harsh chemicals are left behind. Using a natural cleaner gives you that extra peace of mind, especially for items you'll use in the kitchen or bathroom.
All that's left is to dry the jar completely with a lint-free cloth or just let it air dry. And there you have it! Your once-loved candle jar is now a beautiful, blank canvas, totally clean and ready for a fresh start. Whether it becomes a pen holder on your desk or a new home for a succulent, you've officially mastered the art of giving your candle jars a second life.
Common Mistakes to Avoid When Cleaning Candle Jars
Knowing what not to do when you remove candle wax from glass is just as important as knowing the right steps. I’ve seen a few common missteps turn a simple upcycling project into a frustrating mess, potentially ruining a beautiful jar or, even worse, the plumbing.
By sidestepping these common pitfalls, you can make sure the process is smooth and successful every single time.
One of the biggest temptations is to grab a sharp kitchen knife to pry out that stubborn bit of wax at the bottom. It seems like a quick fix, but it's a risky move. The hard edge can easily scratch the inside of the glass, leaving permanent marks. Worse, a little too much pressure can chip the jar or even cause it to crack. It's always better to stick with gentler tools, like a butter knife or a spoon.
Avoiding Thermal Shock and Damaged Glass
Another critical mistake is causing thermal shock. This is what happens when glass goes through a sudden, extreme temperature change, causing it to crack as it expands or contracts too quickly. Pouring boiling water directly into a cool glass jar is a classic way to make this happen.
The same goes for taking a hot jar right out of the oven and running it under cold water. The shock can be instant and irreversible. Just be patient and let your jars warm up or cool down gradually to keep them in one piece.
The Golden Rule of Wax Disposal: Never, under any circumstances, pour melted candle wax down any drain in your home. It might be liquid when it’s hot, but it will cool and solidify inside your pipes, creating a stubborn clog that can lead to expensive plumbing repairs.
Always make sure to wipe out any remaining melted wax with a paper towel and toss it in the rubbish bin.
Keeping Your Drains Safe
Pouring that waxy water down the sink after using the boiling water method is just as bad for your pipes. Even those small, seemingly harmless amounts of wax can build up over time and cause a serious blockage.
The trick is to let the water cool completely. The wax will harden into a solid disc on the surface, which you can just lift out and throw away.
These mistakes are easy to avoid once you know what to look out for. While cleaning jars is usually pretty straightforward, spills can happen. If you’ve ever dealt with a wax catastrophe, you might find our guide on how to remove candle wax from fabric helpful for those other tricky messes. By being mindful of these common errors, you can keep your jars and your home in perfect shape.
Creative Ideas for Your Upcycled Candle Jars
Alright, you’ve done the work and now you have a sparkling clean candle jar. This is where the real fun begins. Figuring out how to get that last bit of wax out is one thing, but giving your beautiful jar a second life is a creative project all on its own.
Think of it as a blank canvas. That empty jar can become so much more than just a container; it's an opportunity to add a personal, sustainable touch to your home decor.
For the Bathroom and Vanity
The clean lines and elegant look of most candle jars make them perfect for tidying up the bathroom counter or vanity. They instantly add a bit of class to those everyday items that can easily create clutter.
- Cotton Swab and Ball Holder: A small or medium jar is the perfect size to keep cotton balls and swabs neat, tidy, and right where you need them.
- Makeup Brush Organizer: I love using taller jars for this. They keep all my makeup brushes upright, clean, and super easy to grab in the morning rush.
- DIY Bath Salt Container: Got a favourite bath salt blend? A larger jar makes for a beautiful, spa-like container next to the tub.
In the Kitchen and Living Room
Your upcycled jars can also pull double duty as charming, practical pieces in your main living areas. They’re so versatile, they seem to fit in with just about any decor style. You can explore more about incorporating glass jars into your home by reading our expert guide on choosing and styling glass jar candles.
A small jar can become a mini herb garden on your kitchen windowsill—perfect for a bit of fresh mint or basil. They also make surprisingly sophisticated vessels for serving individual desserts like parfaits or puddings at a dinner party. Or, for a simple touch of green, use one as a chic little vase for a single bloom or a small bunch of wildflowers.
By finding a new use for your jars, you're doing more than just organizing; you're making a conscious choice to reduce waste. Every upcycled jar is one less item in the landfill and a beautiful new addition to your home.
Getting Creative with Customization
If you really want to make these jars your own, a little customization can go a long way. This is your chance to match them perfectly to your personal style.
Once your candle jars are pristine, you could decorate your cleaned candle jars with decorative vinyl stickers for a quick and impressive upgrade. Other ideas? Try painting the outside with glass paint, wrapping them in rustic twine, or even using a glass-etching cream for a frosted, high-end look.
With just a little effort, a simple cleaning chore transforms into a rewarding home decor project that’s good for the planet, too.
At Shivora Candles, we believe in beauty that lasts, from the first burn to the final upcycle. Discover our collection of premium, clean-burning soy wax candles designed to fill your home with luxurious scents and leave you with a beautiful vessel ready for its next chapter. Find your new favourite fragrance at https://shivoracandles.com.
