

Your candle has reached the end, but the jar still looks too good to throw away. There's a layer of wax around the bottom, a stubborn wick tab, and perhaps a lid you'd like to keep. Before you fill it with cotton pads or turn it into a planter, it needs more than a quick rinse.
Learning how to reuse candle jars starts with separating two very different projects: giving a container a useful second life and putting another flame inside it. For Canadian households, the sensible approach is to clean gently, inspect carefully, choose a non-flame use, and check municipal recycling rules for anything you can't keep.
Table of Contents
- How to Clean Wax Out of a Candle Jar
- Which Jars Are Safe to Reuse or Burn Again
- Storage, Planter and Gift Ideas for Clean Jars
- Decide Between Reuse and Recycling for Leftover Jars
- Choose Your First Reuse Project
How to Clean Wax Out of a Candle Jar
Let the jar cool completely before touching or cleaning it. Don't handle warm glass just because the flame is out, and don't try to speed things along with cold water. Sudden temperature changes are exactly what you want to avoid.
Set out dish soap, a soft cloth, a wooden or plastic scraper, and pliers for the wick tab. Protect the work surface with an old towel, and keep a container nearby for the removed wax.
Use gentle warmth rather than a boiling kettle
The low-thermal-shock approach described in Écodici's candle-container reuse guide uses cooling, warm water, gentle scraping, and a thorough wash rather than abrupt heating.
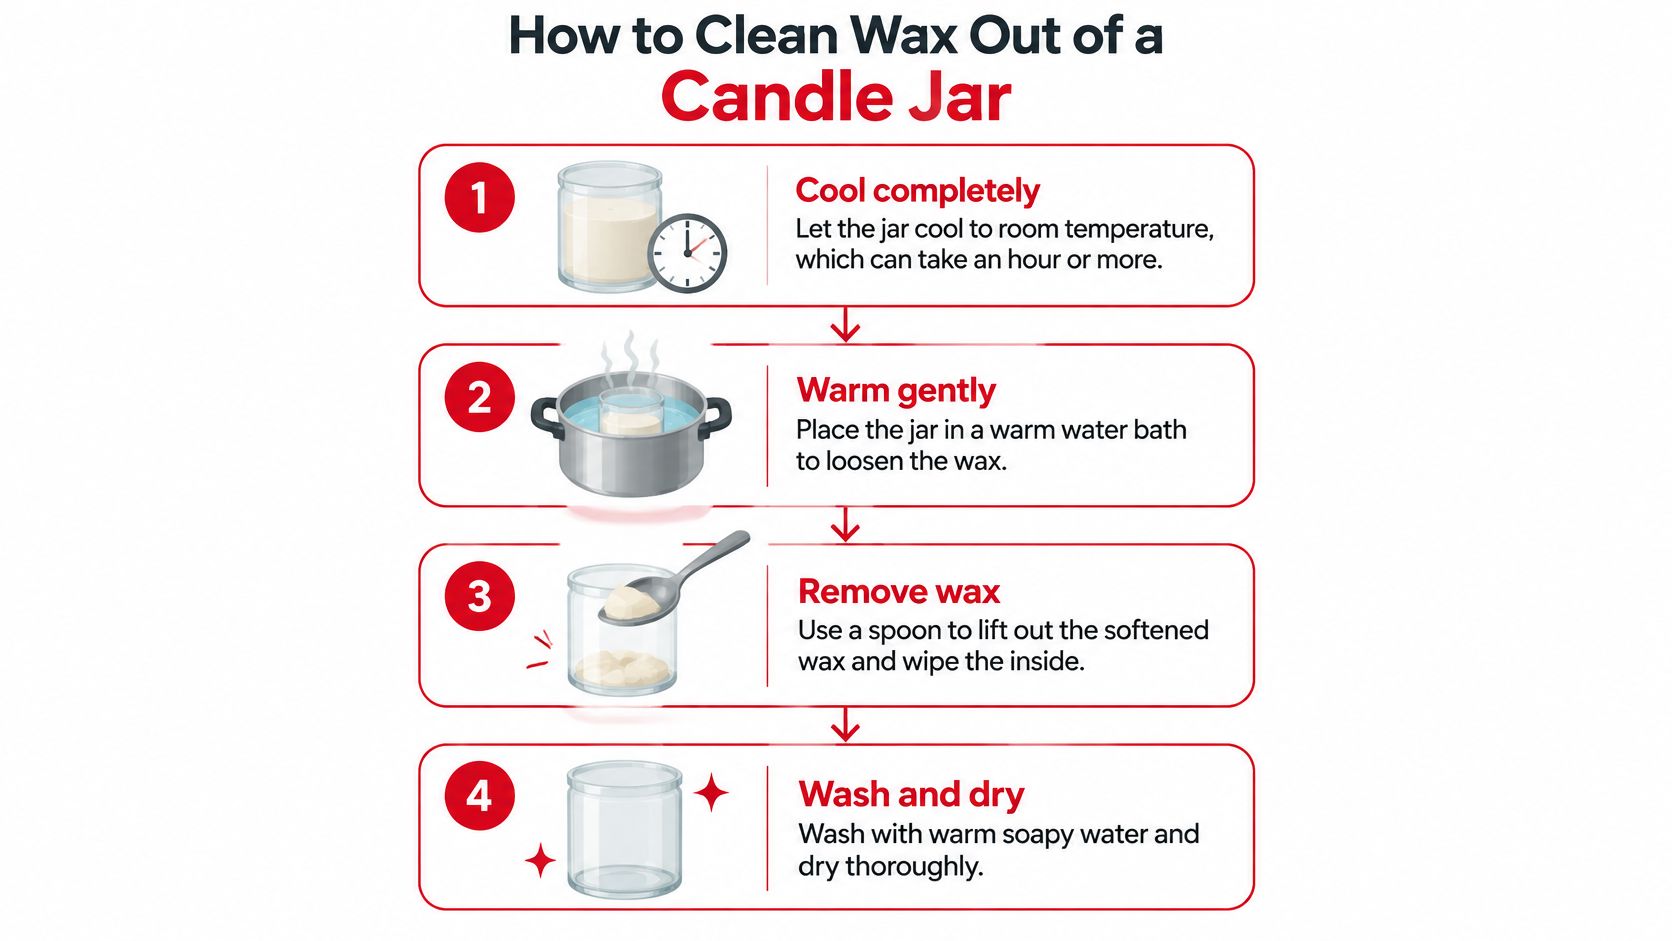
- Cool to room temperature. Leave the candle undisturbed until both the glass and remaining wax have cooled completely. Judge by the jar's condition, not a timer, because a thick base can retain warmth.
- Remove the wick tab. Grip an accessible tab with pliers and lift gently, without levering against the glass. If it's firmly stuck, leave it for the warm-water stage rather than forcing it with a fork or sharp tool, then set the removed hardware aside for disposal.
- Warm the jar gently. Stand it in a sink or basin of warm, not boiling, water to loosen the wax. If you add water inside the vessel to release residue, use warm water there too, never a freshly boiled kettle.
- Collect the released wax. Loosened wax may lift as a plug; wax floating on water should be allowed to cool and solidify before you lift it out. Don't keep increasing the temperature just to make every trace melt.
- Scrape without scratching. Use a wooden spatula or plastic scraper to remove stubborn patches, then wipe out the loose residue. Metal blades can scratch the interior, and aggressive prying can damage the base.
- Wash and dry thoroughly. Once the jar has warmed gradually, wash it with hot soapy water and a soft cloth, rinse, and dry fully. Dish soap helps lift the oily film that a plain-water rinse leaves behind.
This visual gives you the basic cleaning sequence.
Check the result before filling it
Never pour melted wax down the drain. It can harden inside plumbing and cause a blockage, so collect the wax before emptying the wash water.
Cleaning checkpoint: The interior should feel smooth, show no waxy haze under bright light, and be completely dry before you add anything.
A fragrance smell that remains after washing means the jar isn't ready for scent-sensitive contents. Wash again rather than covering the smell with another product, and avoid abrasive pads that could scratch a coated or decorated surface.
For more help with wax clinging to the walls or base, use our guide to removing candle wax from glass. Don't mistake clean-looking glass for glass that has passed a safety inspection.
Which Jars Are Safe to Reuse or Burn Again
| Jar condition | Reuse? | Action |
|---|---|---|
| Clean, intact, no chips | Yes | Reuse for dry goods, craft supplies or cuttings |
| Chip or crack on rim or base | No | Stop using it; recycle only if locally accepted, otherwise dispose safely |
| Cloudy or discoloured glass from heat | No | Retire it; heat damage weakens the glass |
| Heavy soot or black staining | Yes, after soaking | Soak in warm soapy water, scrub, then use for non-food storage only |
| Metal wick tab still attached | Yes, after removal | Remove the tab and wash the base before storage |
| Thin decorative or unknown glass | Décor only | Heat resistance is unknown, so keep it away from any flame |
| Lid cracked or made of a different material | No for the lid | Separate the lid and check local rules for its disposal |
Inspect the base as carefully as the rim
Start with an empty, washed, fully dry jar. All wax and wick hardware should be removed, with no oily film or fragrance residue remaining.
Hold it under bright light and rotate it slowly. Look along the rim, around the bottom edge, and across the base for chips, cracks, deep scratches, or signs of heat damage. Don't run your fingertip along a suspect edge to find a chip.
Set the jar on a flat surface. If it rocks because the base is damaged or distorted, retire it rather than filling it with something heavy. Check the lid separately, especially around the edge and any liner.
A soot stain and heat-damaged glass aren't the same problem. Soot may wash off; cloudiness or discolouration that appears to be within the glass deserves a more cautious decision. If you can't confidently distinguish residue from damage, don't keep the vessel in service.
A storage jar isn't automatically a candle vessel
Health Canada's candle-safety guidance warns that glass candle holders can break when overheated and recommends sturdy, stable holders. A jar's attractive shape doesn't establish its heat resistance, and surviving its original candle doesn't prove it's suitable for repeated heating.
A replacement candle requires a tested combination of vessel dimensions, wax, wick, and fragrance load. Changing the wick or filling a jar with leftover wax isn't a reliable way to reproduce the original burn conditions.
Keep storage reuse and flame reuse separate. A clean jar is a candidate for organising your home, not permission to improvise another candle.
Our candle safety tips provide burn and wick guidance for candles in use. They don't turn an unknown or damaged vessel into an approved refill container.
Keep that distinction in mind when watching candle-jar demonstrations.
Can I refill an old candle jar with wax?
Only consider flame-based reuse when the vessel is specifically intended for it and the complete replacement candle has been professionally tested. For a household project, dry storage is the more straightforward recommendation.
Can I put food in a cleaned candle jar?
I would reserve former scented-candle jars for non-food contents, especially if the container's food-contact suitability is unknown. Removing visible wax doesn't establish that a coating, lid liner, or decorated surface is appropriate for food.
Is reusing a jar better than recycling it?
Keeping a useful, intact container in service postpones collection and processing, but keeping damaged glass isn't a worthwhile trade-off. In its historical household-waste reporting, Statistics Canada found that recycling represented only 27% of residential waste generated in 2004, a useful reminder that recycling access and waste prevention are different things.
The practical rule is simple: reuse sound glass for a real purpose, not merely to avoid throwing it away.
Storage, Planter and Gift Ideas for Clean Jars
A clean 8 oz jar on a dry bathroom shelf can hold cotton pads for months. The same jar beside a running tap collects splashes, stains the glass, and ends up back in the cupboard. Reach, height, and placement decide whether storage reuse is worth keeping.
Use a cleaned jar for dry storage, a plant cover, or a labelled gift. Burning in it again is a separate decision, and it only belongs with a vessel made for flame.
The sizes below are project examples, not promises of usable capacity. Candle size describes the original product, so check the actual opening and interior before choosing the contents.
| Example jar size | Useful project | Placement or preparation |
|---|---|---|
| 4 oz | Water-rooted cuttings | Choose a cutting that fits without crowding |
| 4 oz | Small dry sponge or gift samples | Keep the opening accessible and label gift contents |
| 8 oz | Cotton pads or craft buttons | Store away from splashes and use a clean lid |
| 8 oz | Packaged non-food gift items | Keep contents wrapped if they could leave residue |
| 10 oz | Pencils, brushes or desk supplies | Check that tall items won't make it tip |
| 10 oz | Cover for a small plant pot | Lift out the inner pot for watering and drainage |
Give plants drainage, not just a pretty container
Check the base for a drainage hole before using the jar for plants. With a sealed base, limit the jar to water-rooted cuttings, or use it as a decorative cover around a nursery pot that already drains.
For a potted plant, lift the inner pot out, water it, and let it drain before you set it back in. Roots left in water at the bottom of the candle jar stay wet long after the soil surface looks fine.
If you're considering a glass planting arrangement, The Cactus Outlet's guide to layering gravel for cactus terrariums offers useful context. A gravel layer doesn't create a drainage outlet, so don't treat it as a substitute for a draining pot.
Keep bathroom storage dry and gifts clearly labelled
Put cotton pads into a completely dry jar and leave enough room to lift them out without brushing the rim. A holder on a wet basin edge will take on water even when the glass looked clean that morning.
For gifts, start with non-food contents rather than sweets or homemade preserves. Packaged bath salts, craft materials, or a small self-care assortment can work if you label what is inside and include any use instructions that travel with those items.
Our DIY candle gift ideas can help you build a thoughtful presentation without buying another decorative container.
If the opening is too narrow to use, tall items make the jar tip, or a chip shows up in the sink, stop assigning it a project. That jar belongs in your municipal recycling check, not in another unused cupboard.
Inspect the vessel again after every wash. Glass that was sound on the first repurposing can still chip against a tap or another item.
Decide Between Reuse and Recycling for Leftover Jars
Check the recycling route before putting an unwanted jar beside the blue box. The Government of Canada explains that municipalities handle collection, diversion, and disposal of household waste and recyclables, while provinces and territories may operate extended producer-responsibility programmes.
That local responsibility matters because glass packaging, decorative glass, coatings, and leftover components may receive different instructions. Don't assume a candle vessel belongs in the same stream as a beverage bottle.
Make the local check in order
- Confirm the container type. Search your municipal sorting guide for candle jars, not just glass.
- Prepare the vessel. Scrape out wax and remove the wick tab before offering the glass for collection.
- Separate the lid. Identify its material and check its own disposal stream.
- Handle damage separately. Keep chipped or broken glass out of reuse and follow your municipality's safe-disposal directions.
| Part | Where it usually goes | Check before disposal |
|---|---|---|
| Clean, intact glass jar | Local glass stream or depot, if accepted | Confirm acceptance in the municipal sorting guide |
| Lid | Its own stream, often a different material | Separate it and check local rules |
| Leftover wax | Never down the drain; follow local rules | Let it harden and scrape it out first |
| Metal wick tab | Follow local metal recycling rules | Remove it before the glass goes in |
| Broken or chipped glass | Municipal safe-disposal instructions | Never reuse it |
| Labels and fragrance-contaminated materials | Follow local rules | Wash the jar until no fragrance smell remains |
Clean, intact glass should only enter the locally designated stream. The Capital Regional District's glass-recycling guidance also advises keeping lids separate and not placing jars in plastic bags for recycling.
If your municipality rejects the vessel, follow its disposal instructions rather than adding it to recycling anyway. A contaminated jar shouldn't be forced into either a storage project or a collection stream that doesn't accept it.
Choose Your First Reuse Project
The jar is clean and sitting on the counter. Choose its job now, before you buy paint or hunt for a matching set.
Storage and a second burn ask different things of the glass. Pads, clips, or cuttings need an intact rim and a label. Another flame needs heat-safe glass with the old wick hardware gone. I would not light a jar I cannot confirm as heat-safe. Store in it, or check your municipal glass rules and follow that answer.
Give it one job for a week
Fill it with a single task and leave it for seven days, somewhere you will reach. A damp ring, a wax film that returns, or scent on the contents means another wash. If the smell stays, drop both projects and follow local disposal rules. A chip takes the jar out of reuse.
Write the contents and the start date on tape. By day seven you will know whether the jar earned the shelf.
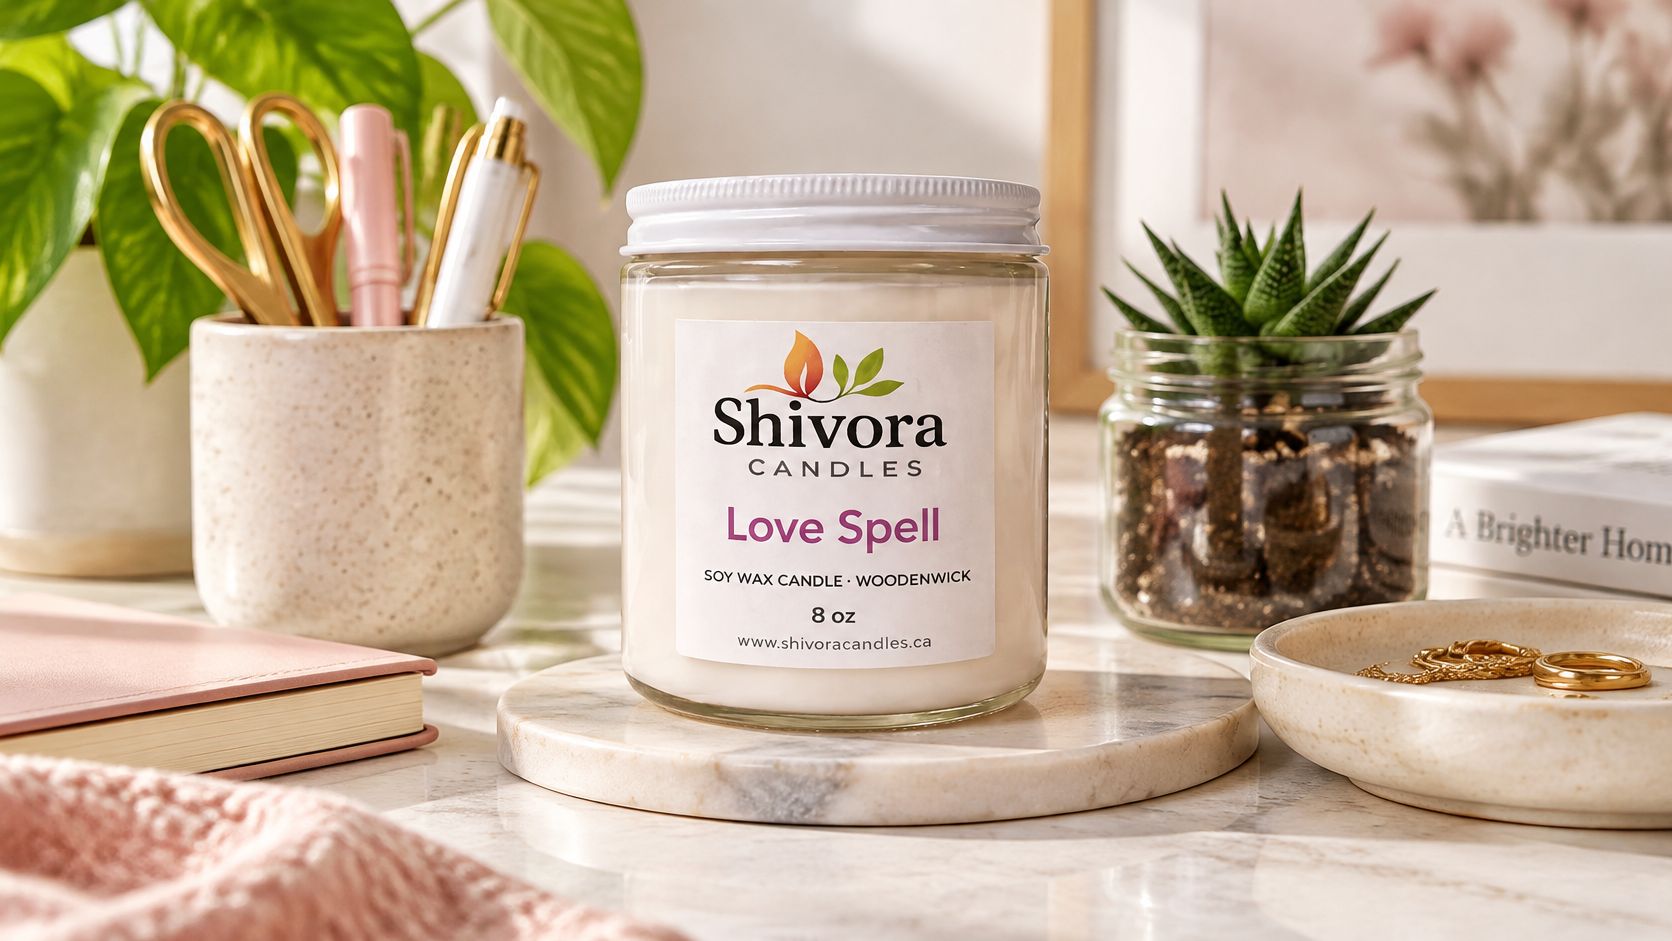
Love Spell Soy Candle Canada – 8 oz Wood Wick is a hand-poured Ontario soy candle with a wood wick, suited to bedrooms and self-care nights. Its 8 oz jar is only a size reference for a later project. Reuse starts after that candle is finished and the glass is clean.
Pick one jar from your cupboard this week and assign it a single job.
Shivora Candles offers hand-poured soy candles and wax melts made in Ontario, Canada, including wood-wick options. Visit Shivora Candles to browse candles and wax melts, and give one finished, undamaged jar a single second use.

